Table of Contents
FAQ: Message Buffering
How to activate the message buffering on my gateway?
To activate message buffering, issue the following command:
lorafwdctl database.enable true
You can verify that the feature is enabled by reading the database.enable variable in the configuration file specified in /etc/default/lorafwd
- For FW < 4.3.3 :
root@klk-lpbs-050792:~ # cat /etc/default/lorafwd
# Configuration file for lorafwd.

# The configuration file.
# The configuration files can be found in: /user/etc/lorafwd
CONFIGURATION_FILE="/user/etc/lorafwd/lorafwd.toml"

# The extra arguments.
EXTRA_ARGS="-v"

root@klk-lpbs-050792:/etc/default # grep -i -A10 "\[ database \]" /user/etc/lorafwd/lorafwd.toml
[ database ]

# Whether or not a persistent database will store the incoming messages until
# they will be sent and acknowledged.
#
# Type:    boolean
# Example: true
# Default: false
#
enable = true
- For FW >= 4.3.3 :
root@klk-lpbs-050792:~ # cat /etc/default/lorafwd
# Configuration file for lorafwd.

# The configuration file.
# The configuration files can be found in: /etc/lorafwd
CONFIGURATION_FILE="/etc/lorafwd/lorafwd.toml"

# The extra arguments.
EXTRA_ARGS="-v"

root@klk-lpbs-050792:/etc/default # grep -i -A10 "\[ database \]" /etc/lorafwd.toml
[ database ]

# Whether or not a persistent database will store the incoming messages until
# they will be sent and acknowledged.
#
# Type:    boolean
# Example: true
# Default: false
#
enable = true
Then restart the packet forwarder:
monit stop lorafwd
monit stop lorad
monit start lorad
monit start lorafwd
How to deactivate the message buffering on my gateway?
To deactivate message buffering, issue the following command:
lorafwdctl database.enable falseYou can verify that the feature is enabled by reading the database.enable variable in the configuration file specified in
/etc/default/lorafwd
- For FW < 4.3.3 :
root@klk-lpbs-050792:~ # cat /etc/default/lorafwd
# Configuration file for lorafwd.

# The configuration file.
# The configuration files can be found in: /user/etc/lorafwd
CONFIGURATION_FILE="/user/etc/lorafwd/lorafwd.toml"

# The extra arguments.
EXTRA_ARGS="-v"

root@klk-lpbs-050792:/etc/default # grep -i -A10 "\[ database \]" /user/etc/lorafwd/lorafwd.toml
[ database ]

# Whether or not a persistent database will store the incoming messages until
# they will be sent and acknowledged.
#
# Type:    boolean
# Example: true
# Default: false
#
enable = false
- For FW >= 4.3.3 :
root@klk-lpbs-050792:~ # cat /etc/default/lorafwd
# Configuration file for lorafwd.

# The configuration file.
# The configuration files can be found in: /etc/lorafwd
CONFIGURATION_FILE="/etc/lorafwd/lorafwd.toml"

# The extra arguments.
EXTRA_ARGS="-v"

root@klk-lpbs-050792:/etc/default # grep -i -A10 "\[ database \]" /etc/lorafwd.toml
[ database ]

# Whether or not a persistent database will store the incoming messages until
# they will be sent and acknowledged.
#
# Type:    boolean
# Example: true
# Default: false
#
enable = false
Then restart the packet forwarder:
monit stop lorafwd
monit stop lorad
monit start lorad
monit start lorafwd
How to configure the number of messages in database ?
The maximum value is 1000 but Kerlink does not recommend to change the default value of 200 to avoid system load issues.
- FW < 4.3.3:
root@klk-lpbs-050792:/etc/default # grep -i -A10 "\[ limit.messages \]" /user/etc/lorafwd/lorafwd.toml
- FW >= 4.3.3:
root@klk-lpbs-050792:/etc/default # grep -i -A8 "The maximum number of messages" /etc/lorafwd.toml
# The maximum number of messages allowed to be stored in the database. When
# full the newest message will replace the oldest one.
#
# Type:    integer
# Example: 20000
# Default: 200
#
#limit.messages = 200
Uncomment the variable limit.messages. Modify the value then restart the packet forwarder:
monit stop lorafwd
monit stop lorad
monit start lorad
monit start lorafwd
How to enable the Message Buffering for a group of gateways ?
The workflow is naturally designed to do this job.
To enable the Message Buffering for a group of gateways, we will use the Workflow template “createGatewayCommand”.
Creating the template
The first step is to create the workflow template.
To achieve this, select the Workflows item from the main left menu and then select 'Templates'.
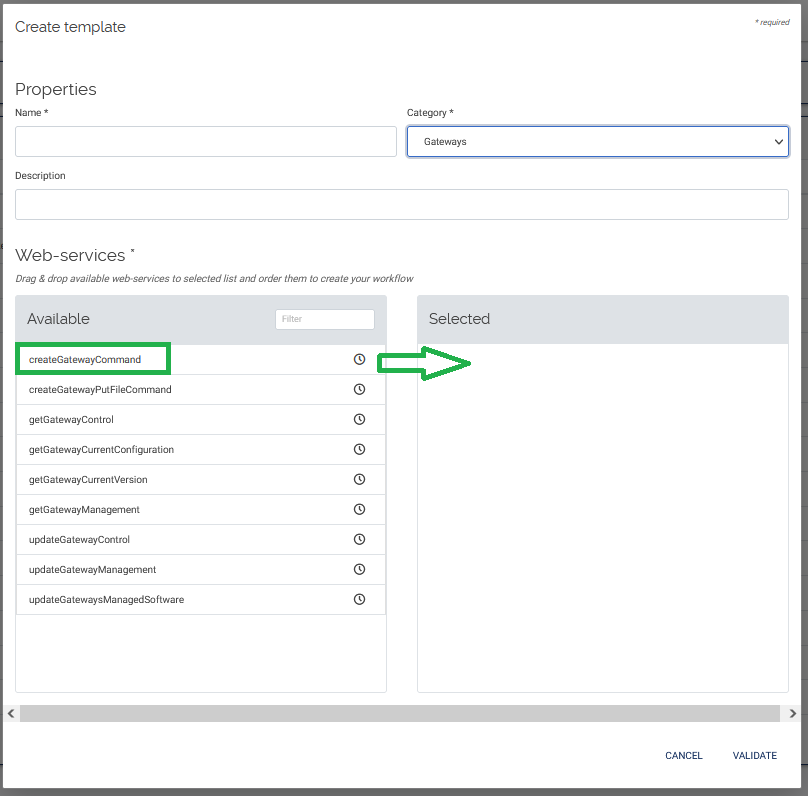
Press the “+” icon to create a new one.
Give a name to your template ex “createGatewayCommand” and give a description. Then drag and drop the web service “createGatewayCommand” to the “Selected” area. Finally select the “VALIDATE” button to confirm the template creation.
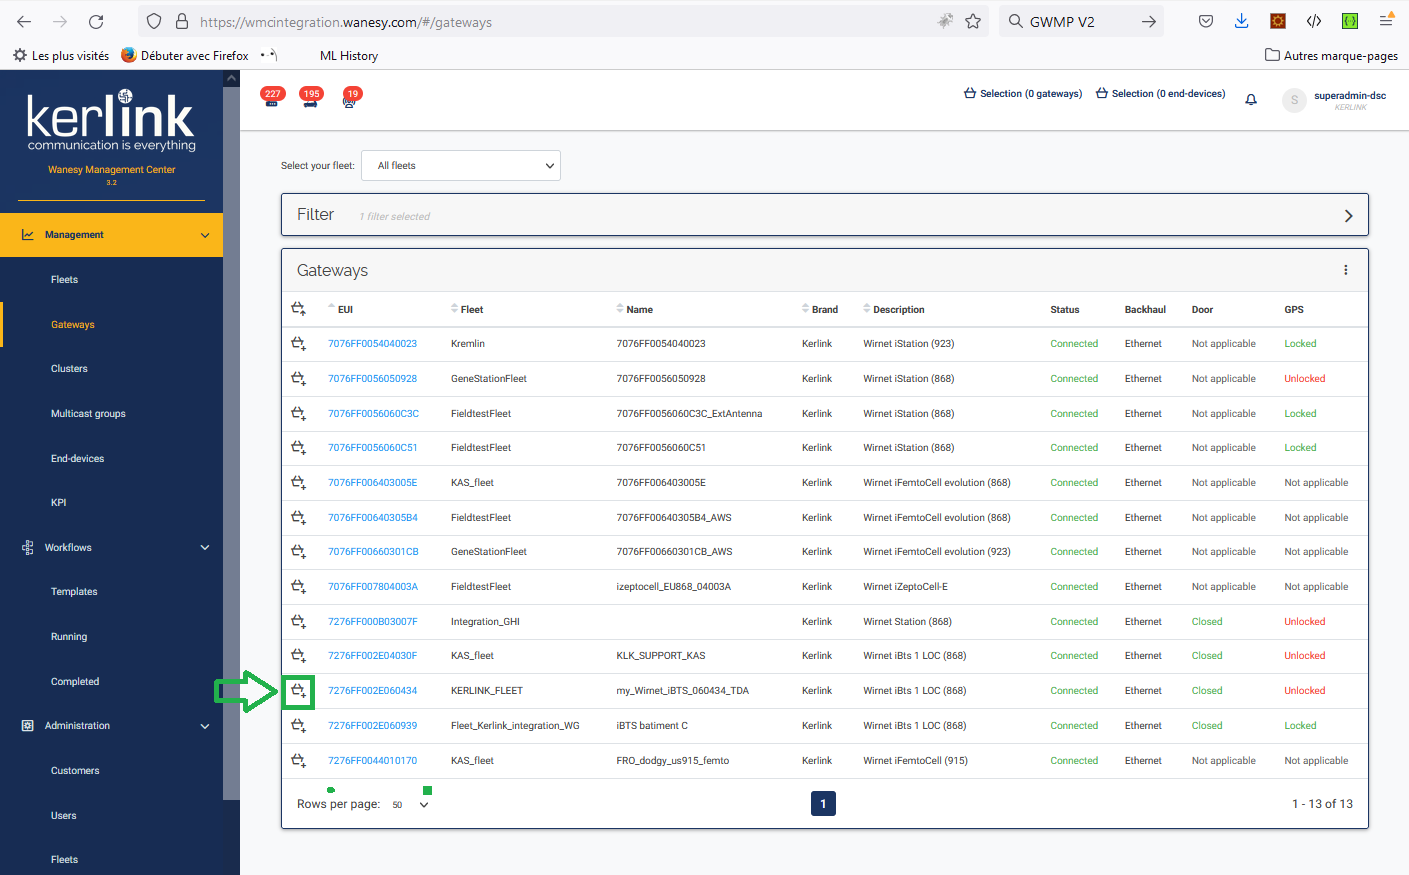
Selecting gateways
Select all the gateways you want to enable the Message Buffering feature. Care to select the same type of gateways (iSeries gateways or Wirnet Stations).
Executing the template
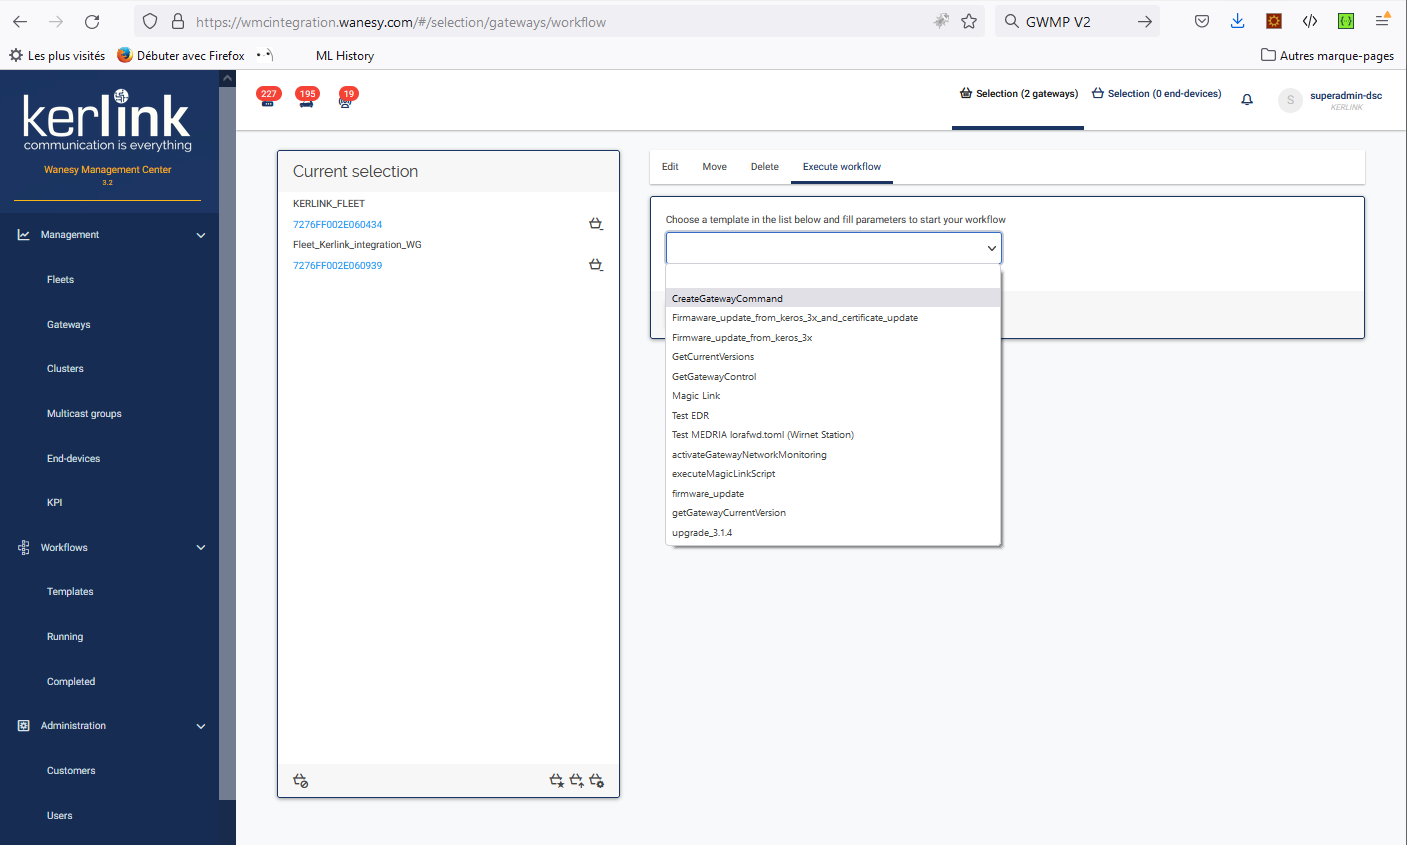
Click the “Selection” item from the top of the page :
Select “Execute workflow” item from the horizontal menu.
Then, select the pull-down menu and select your template :
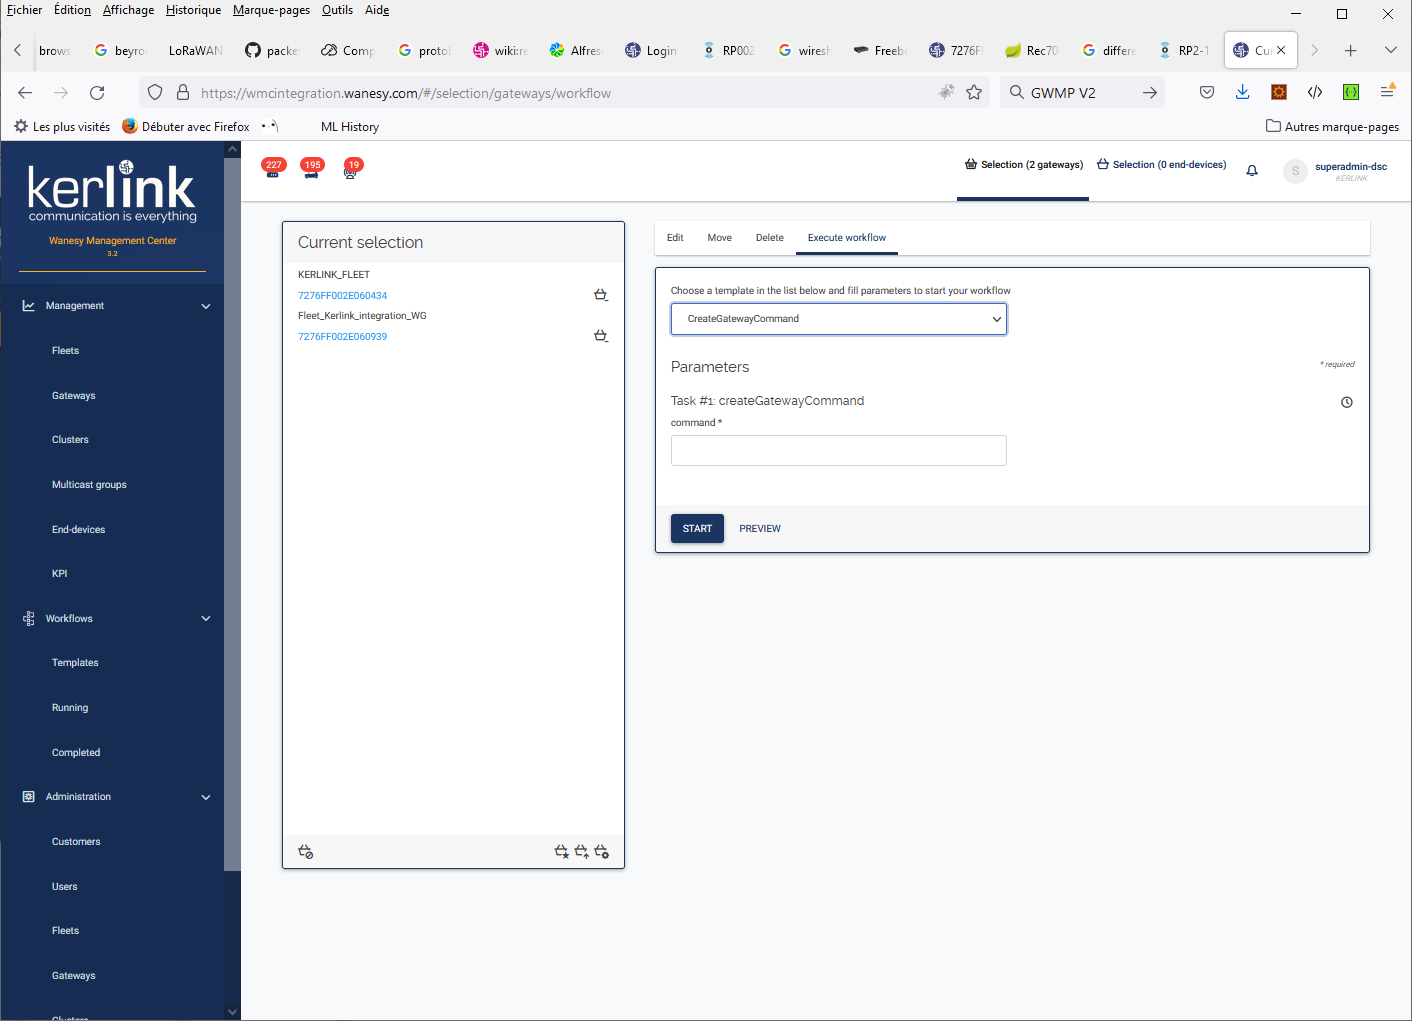
Fill-in the field “command” with the following value :
monit stop lorafwd ; monit stop lorad ; lorafwdctl database.enable true ; monit start lorad ; monit start lorafwd
This command specifies to the system to stop the Packet Forwarder (lorad and lorafwd), changing the property “database.enable” to “true” to enable Message buffering and then restart the Packet Forwarder.
Then press the “START” button to execute the workflow. The following message indicates that the workflow has started :
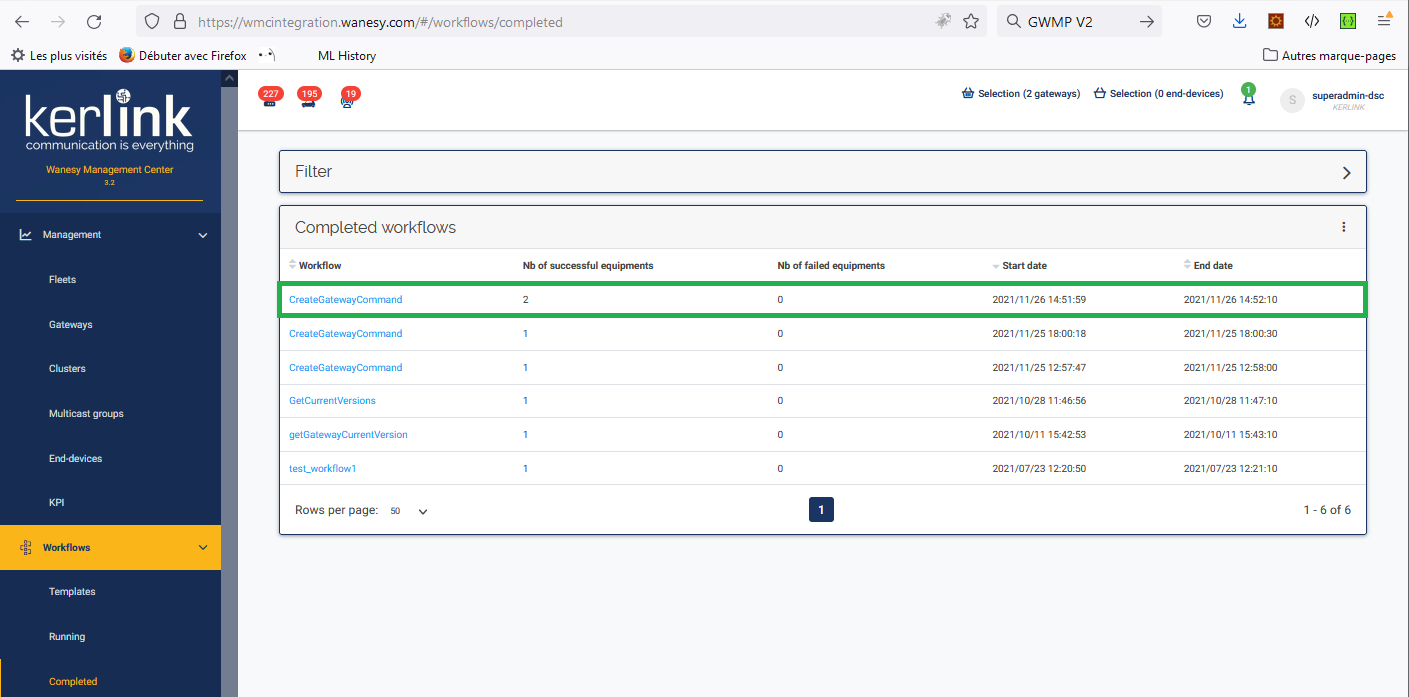
Select the option “Running” in the “Workflows” menu from the left side of the page to check that the workflow is running and then select the option “Completed” and wait for the workflow completion (for 2 gateways the duration is 10 seconds). When terminating, the workflow disappears from the “Running” page and appears in the “Completed” page.
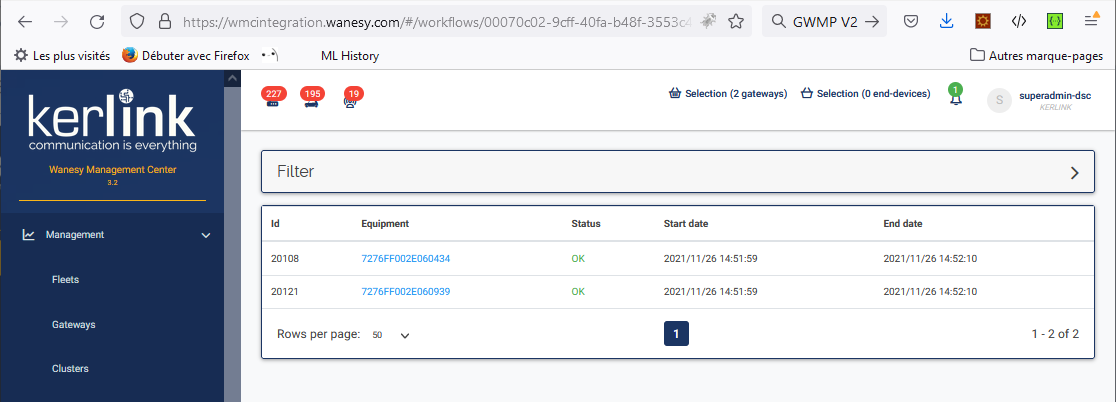
You can click the workflow template (here “createGatewayCommand” to see the individual result of the execution of the workflow for each gateway :
Message Buffering has been activated for all gateways specified in the workflow.
